Automated Android OS deployment with the openQRM IaaS Cloud
This HowTo is about how to provide Android system "on demand" with a private openQRM Cloud.
Requirements
- One physical Server - at least 1 GB of Memory
- at least 100 GB of Diskspace
- VT (Virtualization Technology) enabled in the Systems BIOS so that the openQRM Server can run Virtual Machines later
Please notice!
The Android OS support in openQRM is only available in the openQRM Enterprise Edition >= 5.1.4!
If you are interested in this feature please contact us for a free openQRM Enterprise evaluation edition!
Install openQRM
A detailed Howto about the above initial starting point is available at 'Install openQRM on Debian', and 'Cloud Computing with openQRM on Debian.
For this howto we assume you have successfully made it through Cloud Computing with openQRM on Debian.
Please notice!
For this Howto we have used an additional physical System as a KVM Virtualization host, simply integrated in openQRM via the "local-server" plugin. The setup is also possible If you have just one system and use the openQRM server itself as the KVM Host.
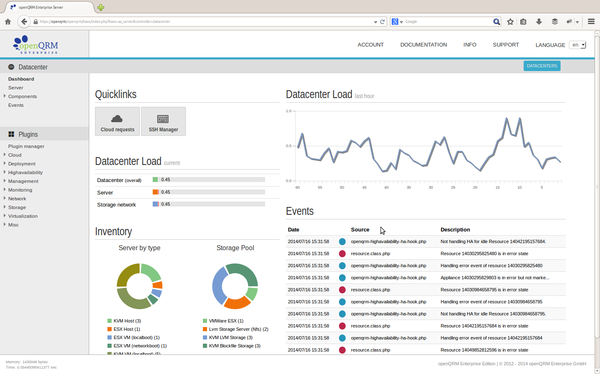
Here the fully installed openQRM server
As install prepartion please login to your KVM Host as "root" and execute the following commands to download the android-x86-4.4-RC2.iso installation iso file for the Android installation in a VM.
mkdir /iso
cd /iso
wget -O android-x86-4.4-RC2.iso sourceforge.net/projects/android-x86/files/Release%204.4/android-x86-4.4-RC2.iso/download
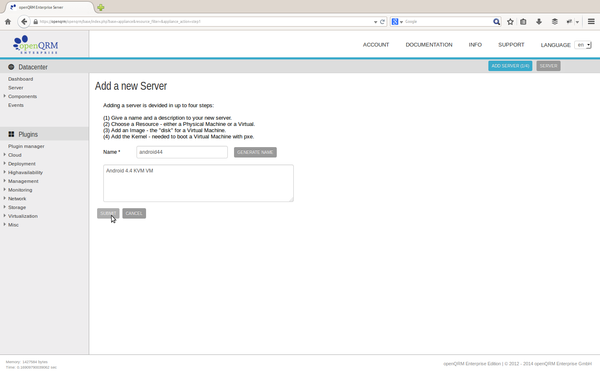
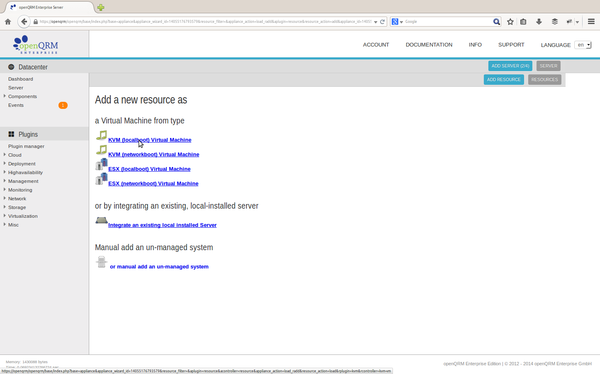
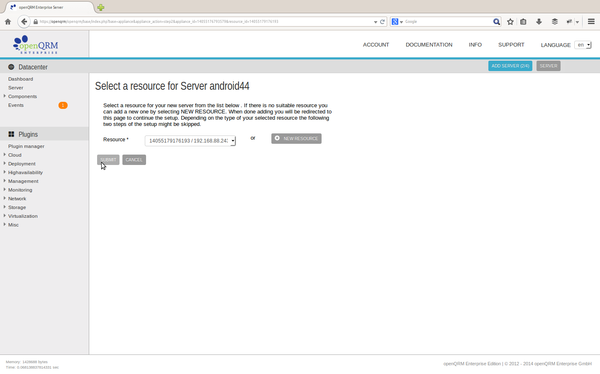
We now start by creating a new server for the Android OS installation. The image of this server is later used as a "master-image" for the openQRM Cloud. Please go to:
Datacenter -> Server
and click on "Add new server". Provide a name (here "android44) and a description.
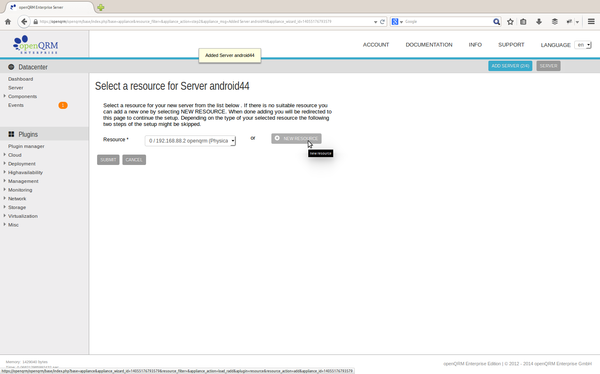
In the second server wizard step please select "New resource"
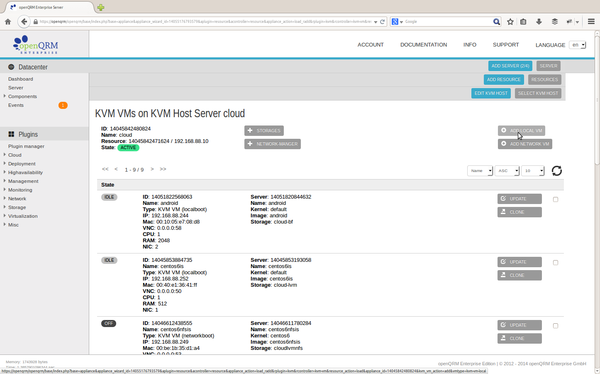
Select the type of Virtual Machine you would like to create. Here we choose "KVM VM (localboot).
Now select your KVM Host. In the VM overview please click on "Add local VM".
In the create VM form please select at least 2 GB memory. Also make sure you set the "Disk interface" for the virtual disk image to "IDE" (virtio support in Android is still experimental).
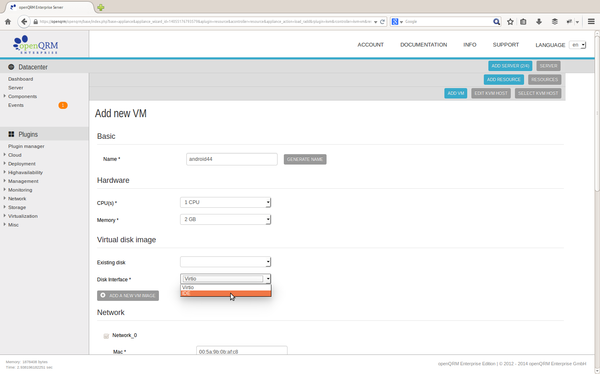
You can leave the "Network card type" to "virtio". This will work fine even without the virtio support in the Android OS.
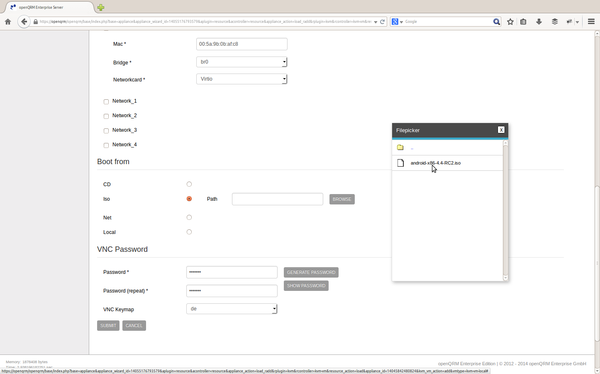
Further down in the VM create form select to boot from an ISO image and use the file-picker to pick the ISO file to boot from on the KVM Host. Also provide a VNC password and adjust the vnc-keymapping to your needs. Then click on "submit".
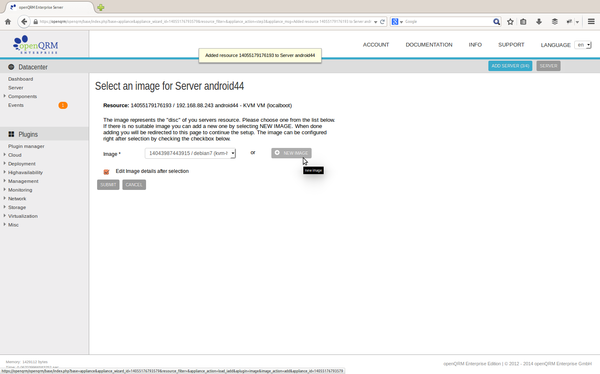
The next step will continue with the server wizard. Simply select the newly created VM resource.
When configuring the image for the server please click on "new image".
In the image type selection choose "LVM deployment for KVM".
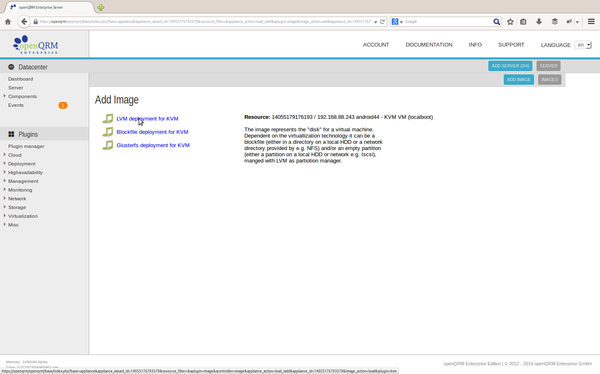
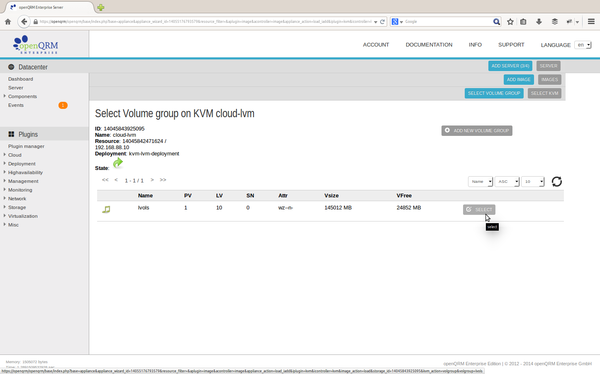
Now please select the KVM storage from the type "KVM LVM Storage".
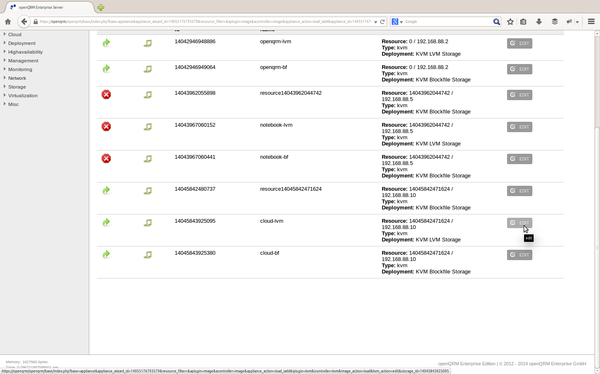
This presents an overview about all the existing LVM volume groups on this storage. Please select one volume group to create the new image on. Here we choose the "lvols" LVM volume group.
If you haven't setup LVM on your KVM storage Host yet click on "add volume group" which will open up the device-manger plugin to setup and manage the attached storage devices with LVM.
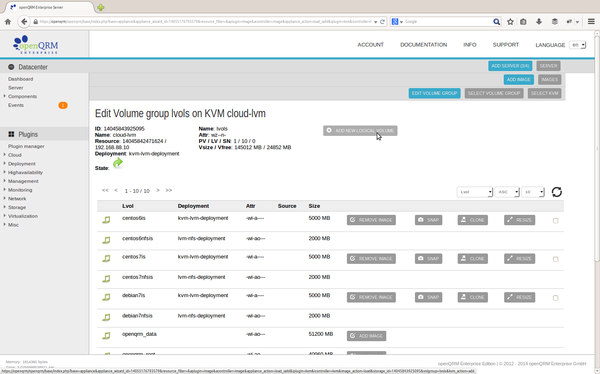
In the LVM volume overview please click on "add new logical volume".
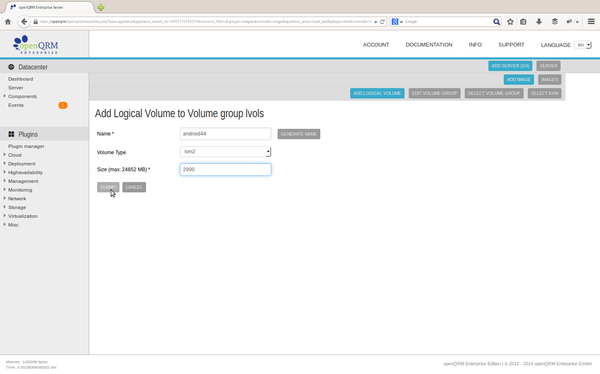
In the "create volume" form please provide the volume size (in MB). Here we go with 2000 MB which is sufficiant to install the Android OS.
The volume size is fully adjustable and provides an automated LVM-resize and filesytem resize for the first partition of the volume. This functionality is also available for "snap" and "clone" actions. Please notice that due to the technical implementation of LVM, snapshots can only be resized smaller or equal to the "master volume" while the LVM clone action allows resizing to a bigger size than the "master".
For Cloud deployment the preferred deployment action (snap or clone) can be configured in the KVM plugins configuration options in the plugin manager.
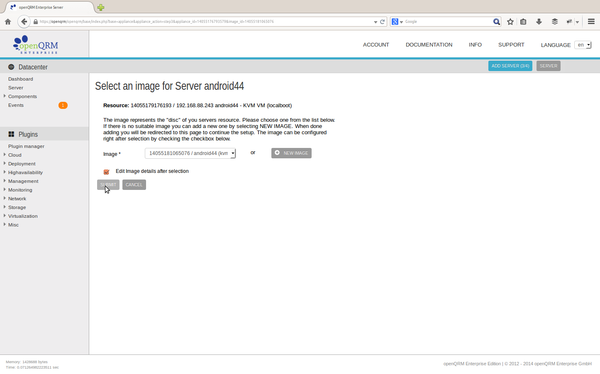
Creating the new volume and its image object in openQRM continues with the server wizard. Please click on submit on the pre-selected just created image.
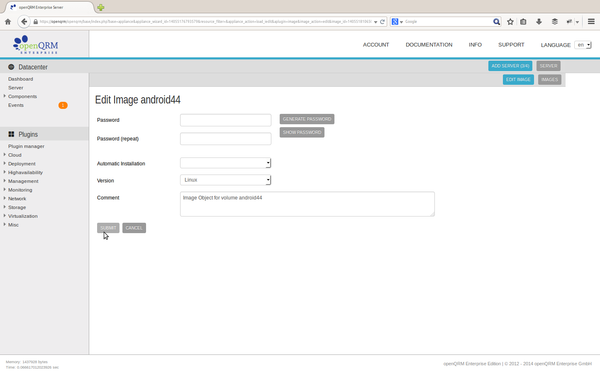
In the "image edit" section you can set a custom password for the image console- and ssh login. Please notice that for Windows OS installation on an image the image type should be set to "windows" instead of "linux".
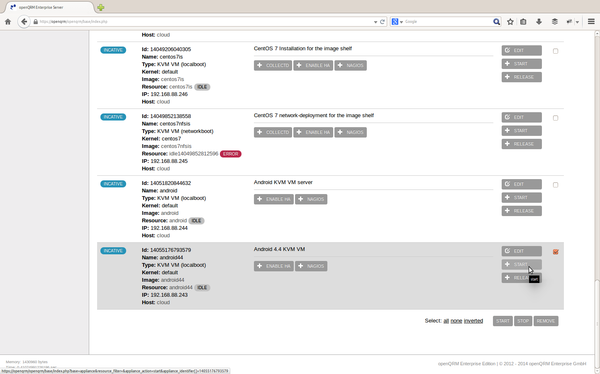
The previous action finalizes the server wizard and forwards to the server list. Click on the "start" button of the new created server.
Just for info:
Starting a server will "combine" the "resource" with the "image" configured in the "server". Stopping a "server" will automatically "separate" the "image" from the "resource". That way each of the objects in openQRM become completely indepent from each other and e.g. can be re-combined with diffrent or updated sub-objects. Also this makes it very straight forward to e.g. restart an "image" with a diffrent "resource" (even with a different resource type in case of P2V/V2P) in case of a automatic high-availability fail-over event.
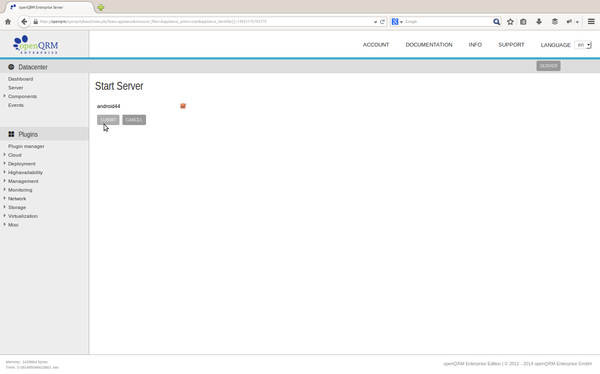
Please confirm starting the server.
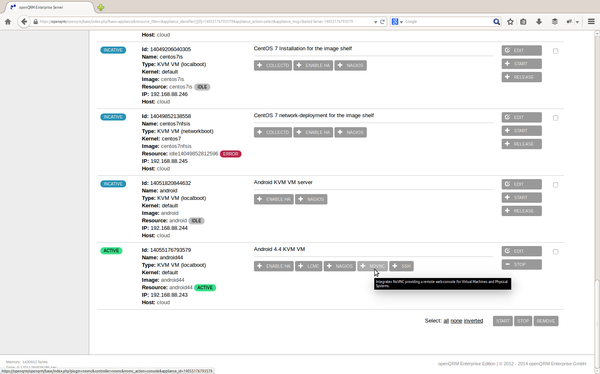
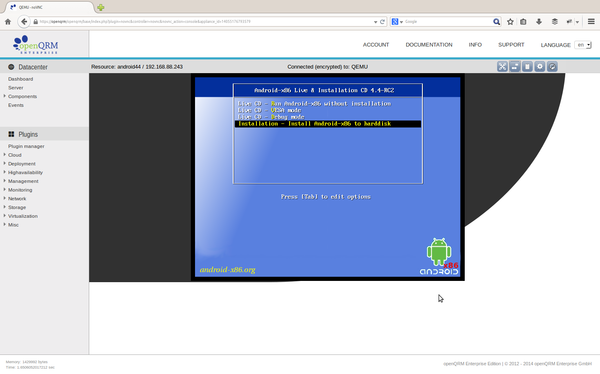
When the server is started please click on the "NoVNC" in the server action tab. This will open up a VNC console in the web-browser and allows to install the Android OS.
Here the VNC console of the VM. In the Grub menu of the starting VM booting from the Android installation iso please select the last option "Installation - install Androidx86 to harddisk" and press return.
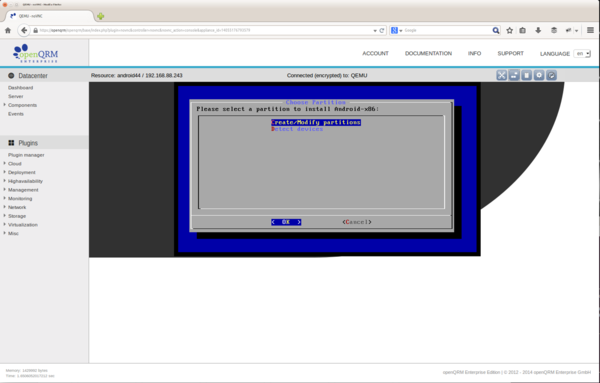
When the installer starts please select "create/modify partitions"
Select "new" to create a new partition.

Select "primary".
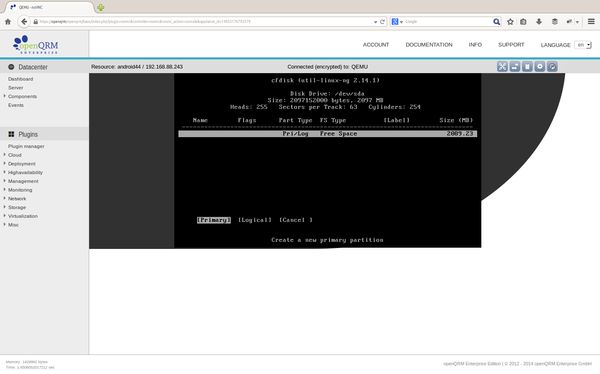
Make sure to set the "bootable" flag.

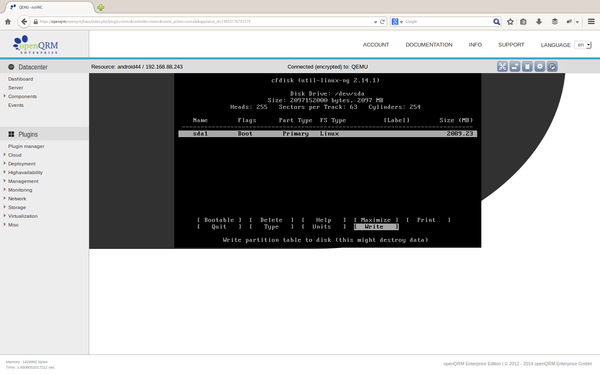
Now select "write" and confirm to setup the partition.
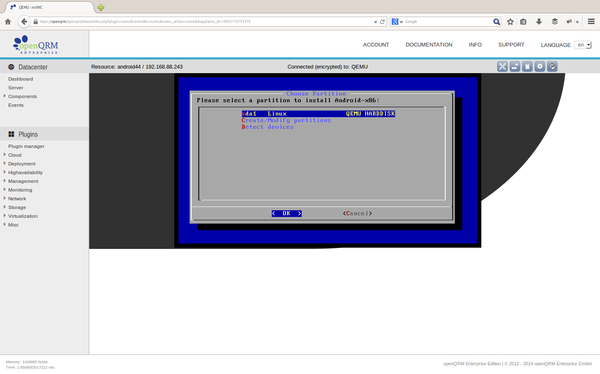
Back in the Android installer select the just created new partition sda1.
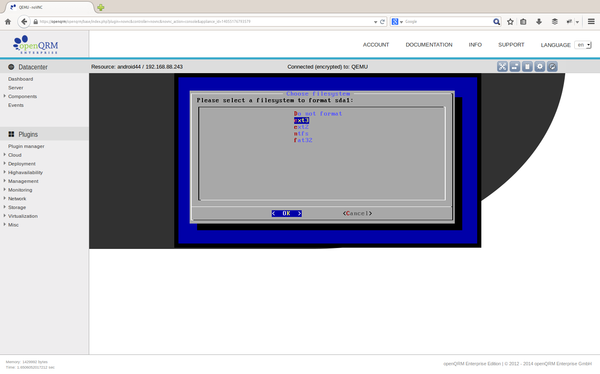
Please select "ext3" as the filesystem type for this partition.
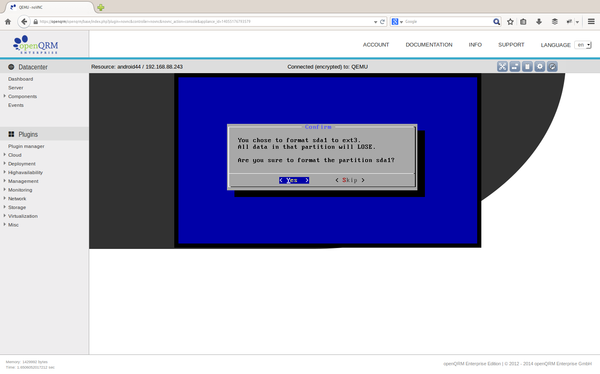
Confirm with "Yes" to create the filesystem.
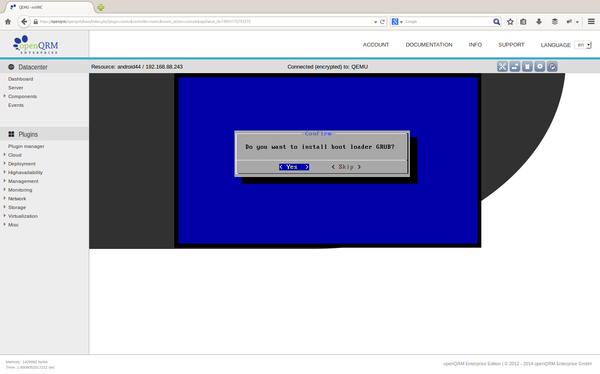
Also select "Yes" when the installer asks if to install the grub boot-manager.
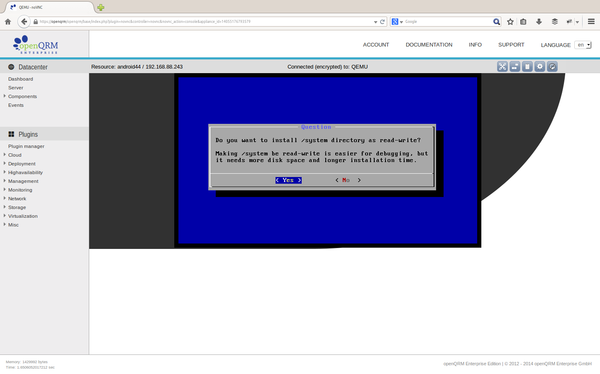
In the following dialog also select "Yes" for making the system partition of the Android OS read+writeable. This is usefull (and needed) to adjust the Android image later.
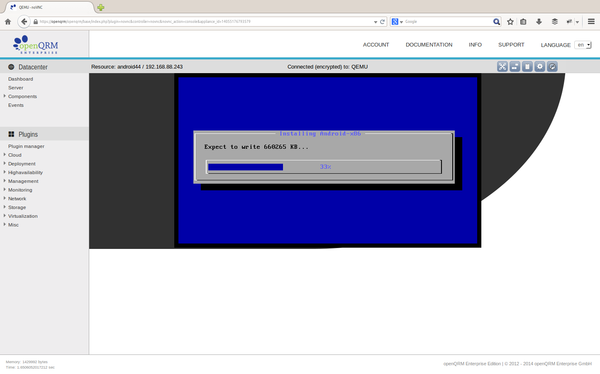
Enjoy the quick installation and please continue on page 2.